4L60E Repair
Guide - Installation 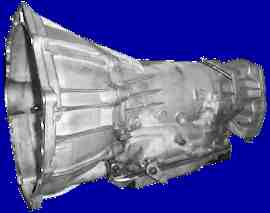
INSTALLATION
Before installing the repaired
transmission into the
vehicle, several items should be addressed. Verify the
transmission dipstick is removed from its tube. Drain the
transmission oil cooler, since any contaminated oil there or in the
lines can ruin your work in very short order. Tape or retain all
wire harnesses, hoses, fuel lines, and cables out of the way of the
transmission tunnel to avoid damage. Inspect the flex plate
closely for signs of cracking, damage to the starter ring gear, and
loose crankshaft flange bolts. Apply a light film of TransGel or
Vaseline to the pilot bore of the crankshaft.
As the transmission is hoisted back into position, mind the dipstick
tube as you position the
transmission. You
should also monitor the electrical harnesses, hoses, tubes, and
linkages are being kept clear. Align the transmission onto the
engine
dowels, and install several bolts to gently and evenly pull the
transmission onto the engine. Torque the transmission to engine
mounting bolts to 40 ft/lb. On Vortec engines with a cast
aluminum oil
pan, torque the lower transmission mounting bolts (threading into the
oil pan) to 33 ft/lb.
Apply LocTite 242 or 262 to the
threads of the torque converter bolts, and torque the TC bolts to 45
ft/lb. Do not use antiseize compound on these fasteners.
Install the starter closure ring and
starter.
Support the engine and transmission
from the engine so that the trans jack can be removed safely.
Install AWD adapter and transfer case
if equipped. Torque the adapter and transfer case mounting
bolts to 33 ft/lb.
Install the cross member and
transmission mount. Connect all external wiring, hoses, and
linkages
to the transmission, transfer case, and mount the neutral safety switch
and linkage.
Hang the exhaust loosely.
Install front and rear drive shafts
(match-marked). Torque the universal joint strap bolts to 27
ft/lb. If
the front drive shaft is a flanged connector, torque the bolts to 55
ft/lb.
Install the oxygen sensors.
Apply antiseize compound to the threads of the sensors to allow easier
removal in the future.
For AWD and 4WD models, fill the
transfer case with 1.9L AutoTrak II oil.
Add five quarts ATF to permit safe
start up and to fill the torque converter.
Tighten the exhaust system.
Verify the gear selector is in
NEUTRAL, reconnect the battery, and start the engine, Test run on the
jack stands to pump fluid to the torque converter, and check and
fill
the transmission oil level as necessary.
Operate through reverse, all forward
ranges, and 4WD (if equipped).
Top off fluid once transmission is
warmed fully. Capacity should be 11-14 quarts total.
Lower and test drive in all ranges
operate automatically and manually.
Check final fluid level after driving
and with a fully warmed transmission.
Happy
Motoring! - Vader
-
2006